Watercolor techniques are a crucial part of creating beautiful artwork. Whether you’re a beginner or looking to improve your skills, mastering these techniques can take your watercolor paintings to the next level. In this comprehensive guide, we will explore different watercolor techniques and provide valuable tips for beginners.

Key Takeaways:
- Watercolor techniques enhance the beauty of artwork and are essential to learn for beginners.
- Understanding various watercolor techniques can help artists express their creativity effectively.
- Wet-on-wet, wet-on-dry, dry on wet, dry on dry, charging-in, and glazing are some of the popular techniques to explore.
- Mastering watercolor techniques requires patience, practice, and an open mind for experimentation.
- Following tips such as painting in a specific order and choosing the right paper can improve your watercolor skills.
Understanding Watercolor Techniques
Watercolor techniques are essential for artists to create stunning and expressive artworks. These techniques encompass a wide range of methods and approaches that allow artists to apply and manipulate paint in various ways, resulting in unique and mesmerizing effects. In this section, we will explore some of the most popular watercolor techniques and delve into their characteristics and applications.
Popular Watercolor Painting Techniques
1. Wet-on-Wet Technique: This technique involves applying wet paint onto a wet surface, allowing colors to mix and blend seamlessly. It is ideal for creating soft edges, smooth transitions, and atmospheric effects. Artists often use this technique for painting landscapes, skies, and abstract backgrounds.
2. Wet-on-Dry Technique: In contrast to wet-on-wet, the wet-on-dry technique involves applying wet paint onto a dry surface. This technique offers greater control and precision, allowing artists to create crisp edges, fine details, and textured effects. It is commonly used for architectural illustrations, botanical paintings, and intricate subjects.
3. Dry Brush Technique: The dry brush technique involves using a dry brush with minimal water and pigment to create textured strokes and details. By dragging the brush across the rough surface of the paper, artists can achieve a variety of textures and add depth and dimension to their paintings. This technique is often employed for painting foliage, tree bark, and rough surfaces.
4. Masking Technique: The masking technique involves using masking fluid or tape to protect specific areas of the paper from paint. By covering these areas, artists can freely apply washes and paint over them without worrying about unwanted color bleeding or blending. Once the paint has dried, the masking material is removed, revealing the preserved white or light-colored areas. This technique is commonly used for preserving highlights, creating intricate patterns, or achieving complex compositions.
Comparison of Watercolor Techniques
| Technique | Characteristics | Applications |
|---|---|---|
| Wet-on-Wet | Soft edges, blended washes, atmospheric effects | Landscape painting, abstract backgrounds |
| Wet-on-Dry | Crisp edges, fine details, textured effects | Architectural illustration, botanical painting, intricate subjects |
| Dry Brush | Textured strokes, depth, and dimension | Foliage, tree bark, rough surfaces |
| Masking | Preservation of highlights, intricate patterns | Highlight preservation, complex compositions |
Mastering watercolor techniques requires practice, experimentation, and a deep understanding of each method’s unique qualities. As you explore these techniques, don’t be afraid to experiment, mix techniques, and develop your signature style. You may find that combining different techniques can result in breathtaking and innovative artworks. With dedication and passion, you can unlock the full potential of watercolor art and create beautiful and captivating paintings.
Wet-on-Wet Watercolor Technique
The wet-on-wet watercolor technique is a popular method used by artists to create soft and blended washes with beautiful textures in their artwork. This technique involves applying wet paint onto a wet surface, allowing colors to blend and bleed together, resulting in harmonious and amorphous shapes. It is particularly suitable for creating soft and blurry forms, such as painting clouds, and achieving smooth transitions of color.
To achieve the wet-on-wet effect, artists start by dampening the watercolor paper with water. They then load their brush with pigment and apply it to the wet surface. The wetness of the paper allows the paint to spread and flow, creating soft edges and blending the colors seamlessly.
However, it is important to maintain a careful balance of water and paint, as excessive wetness can cause the paper to buckle. Artists should experiment with different water-to-paint ratios and learn to control the amount of water they use. This technique requires a level of skill and practice to achieve the desired effect.
Advantages of Wet-on-Wet Technique:
- Creates soft and blended washes
- Allows for smooth transitions of color
- Produces harmonious and amorphous shapes
- Ideal for creating soft and blurry forms
Tips for Using Wet-on-Wet Watercolor Technique:
- Experiment with different water-to-paint ratios to achieve desired effects.
- Practice controlling the amount of water used to prevent excessive wetness and paper buckling.
- Use soft brushes and high-quality watercolor paints for better results.
- Start with light washes and gradually build up the intensity of colors.
Wet-on-Dry Watercolor Technique
The wet-on-dry watercolor technique is a popular method that allows artists to achieve precise shapes and sharp edges in their paintings. In this technique, wet paint is applied onto a dry surface, giving the artist more control and allowing for layering of colors to create depth and intensity.
Unlike the wet-on-wet technique, which produces soft and blended washes, wet-on-dry watercolor is commonly used in illustration-style art and provides detailed elements and well-defined shapes.
To execute the wet-on-dry technique effectively, artists need to wait for each brushstroke to dry completely before applying the next one. This ensures that the colors remain separate and distinct, allowing for the layering of different hues and the creation of intricate details.
It’s important to note that artists must be mindful of the drying time when using the wet-on-dry technique. Waiting for the paint to dry completely before adding more layers helps prevent unwanted streaks or smudging. Patience is key to achieving precise shapes and clean edges.
If you’re looking to create artwork with sharp and detailed elements, the wet-on-dry watercolor technique is a valuable skill to master. Practice layering colors on a dry surface and experiment with different brushstrokes to achieve the desired effects.
Benefits of Wet-on-Dry Watercolor Technique
- Allows for precise shapes and sharp edges
- Enables layering of colors for depth and intensity
- Perfect for creating detailed elements in illustration-style art
- Gives artists more control over the painting process
Dry on Wet Technique
The dry on wet technique is a lesser-known but incredibly versatile method in watercolor painting. Contrary to its name, this technique involves using a slightly wet brush to apply paint onto a wetter paper surface, resulting in captivating and subtle effects. By leveraging the interplay between wet paint and a damp surface, artists can create delicate details and enhance the vibrancy of colors, adding depth and nuance to their artwork.
When using the dry on wet technique, it’s essential to ensure that the brush still contains some moisture. This allows the paint to seamlessly blend with the wet surface, enabling smoother transitions and a more harmonious appearance. Artists can achieve this by either diluting their paint slightly with water or directly applying undiluted paint from the tube into a wet wash.
The dry on wet technique is particularly useful for capturing subtle shapes and soft textures in watercolor paintings. By utilizing this method, artists can create gradients, washes, and glazes that add visual interest and depth to their artwork. The combination of wet paint on wet paper enables the colors to blend naturally and organically, resulting in beautiful transitions and captivating effects.
Experimentation is key when exploring the dry on wet technique. Artists can vary the amount of water in their washes, the intensity of the paint, and the brushstroke techniques to achieve different outcomes. Some may opt for a wetter surface to create more diffuse and seamless shapes, while others may prefer a drier surface to maintain distinct edges and define their subjects more precisely.
Advantages of the Dry on Wet Technique:
- Creates subtle and delicate details
- Enhances color vibrancy
- Allows for smooth transitions and blending
- Adds depth and nuance to paintings
- Enables the creation of gradients and washes
Best Practices for the Dry on Wet Technique:
- Ensure your brush has some moisture, but not excessively wet.
- Prepare a wet surface by applying a water wash to the paper.
- Use slightly diluted paint or apply undiluted paint from the tube into the wet wash.
- Experiment with brushstroke techniques and the amount of water in the wash to achieve desired effects.
- Take advantage of the natural blending and diffusion of colors to create subtle shapes and textures.
By mastering the dry on wet technique, artists can unlock new possibilities and take their watercolor paintings to the next level. This method provides a unique way to explore subtle shapes, enhance color vibrancy, and add depth and nuance to artwork. With practice and experimentation, artists can harness the dynamic qualities of watercolor and create stunning works of art.
Dry on Dry Technique
The dry on dry watercolor technique is a versatile method that allows artists to add textured brushstrokes and create interesting effects on rough watercolor paper. By using a dry brush on dry paper, artists can achieve unique textures and imply movement in their subjects. This technique is particularly effective when combined with thicker watercolor paper.
How to Use the Dry on Dry Technique
To utilize the dry on dry technique, follow these steps:
- Make sure you have a flat, dry brush.
- Choose the desired color and load the brush with dry pigment.
- Drag the dry brush across the raised bumps of the paper.
- As you do so, the paint will drop onto those areas, while the indents remain white.
By manipulating the dry brush on the textured paper, you can create various brushstroke patterns and enhance the depth and dimension of your painting.
Benefits of the Dry on Dry Technique
The dry on dry technique offers several advantages for watercolor artists:
- Textured Brushstrokes: This technique allows artists to add texture and visual interest to their paintings by utilizing the roughness of the paper surface.
- Depth and Dimension: By dragging a dry brush across the paper, you can create the illusion of depth and dimension in your artwork.
- Control: The dry on dry technique offers artists more control over the placement and intensity of their brushstrokes.
When using the dry on dry technique, keep in mind the nature of your brush, paper, and desired effects. Experiment with different brushes and apply varying degrees of pressure to achieve unique and engaging textured brushstrokes in your watercolor paintings.
| Pros | Cons |
|---|---|
| Allows for textured brushstrokes and interesting effects | Requires a dry brush and dry paper |
| Adds depth and dimension to paintings | Works best with thicker watercolor paper |
| Offers control over brushstroke placement | May require experimentation to achieve desired results |
Charging-in (Feathering) Technique
The charging-in technique, also known as feathering, is a popular watercolor technique that allows artists to create smooth variations of color and produce feathery textures. This technique involves dropping watercolor onto a damp surface to achieve subtle transitions and add intricate details to paintings.
When using the charging-in technique, artists apply paint to a damp or moist area on the paper. The wetness of both the paper and the brush influences the results, allowing for controlled blending and color diffusion. By adjusting the amount of water and paint, artists can control the effects and create unique textures.
Charging-in is a versatile technique that enhances the overall quality and visual complexity of a watercolor painting. It can be used to create soft and muted backgrounds, add dimension to objects, and achieve realistic effects such as fabric textures or fur.
Benefits of the Charging-in Technique:
- Creates smooth variations of color
- Produces feathery textures
- Allows for controlled blending and color diffusion
- Enhances the overall quality and visual complexity of a painting
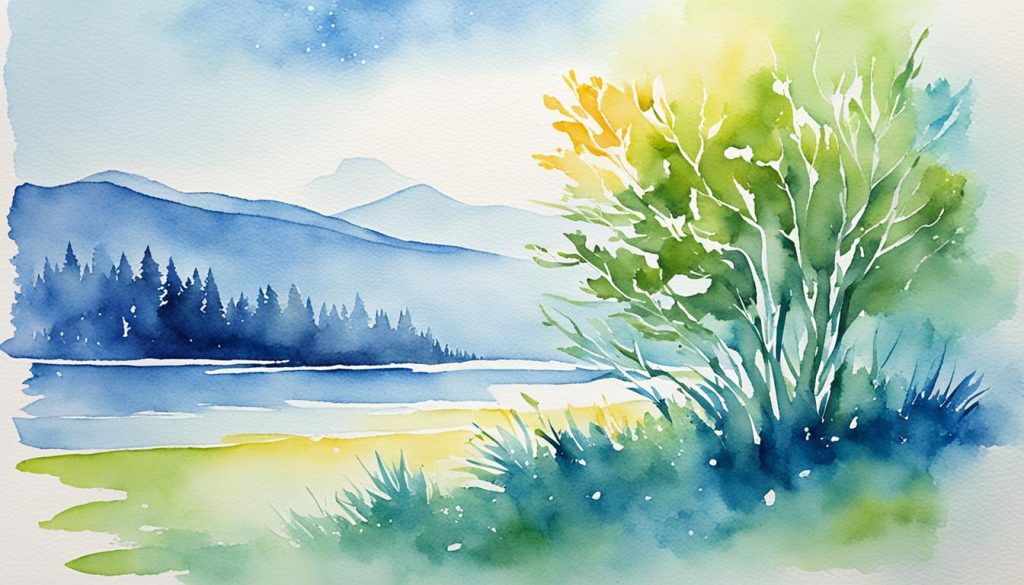
To better understand the charging-in technique, let’s take a look at an example of a watercolor painting that incorporates this technique:
| Watercolor Painting Example |
|---|
 |
In this example, the artist has used the charging-in technique to create soft and blended washes, resulting in feathery textures and subtle transitions of color. The charging-in technique adds depth and visual interest to the painting, making it more engaging and captivating for the viewer.
By mastering the charging-in technique and experimenting with different colors and dampness levels, artists can unleash their creativity and achieve stunning watercolor effects in their artwork. With practice and dedication, this technique can elevate the quality and aesthetics of your watercolor paintings.
Glazing Technique
The glazing technique, also known as layering, is a fundamental concept in watercolor painting. It involves applying multiple layers of transparent paint, allowing each layer to dry before adding the next. Glazing creates depth, intensity, and modification of colors in a painting. The transparency of watercolors allows each brushstroke to be visible underneath subsequent layers, resulting in a luminous and layered effect.
Artists often begin by painting lighter tones using thin and diluted washes and gradually build up darker values and richer colors. Glazing offers precise control over shifts in hue and tone, and artists can experiment with color mixing and transparency to achieve desired effects.
Benefits of the Glazing Technique
- Creates depth and dimension in a painting
- Enhances color intensity and vibrancy
- Allows for precise control over hue and tone shifts
- Creates a luminous and layered effect
- Allows for experimentation with color mixing and transparency
Steps for Using the Glazing Technique
- Start with a light sketch or outline of your subject
- Apply a thin and diluted wash of the lightest color
- Allow the first layer to fully dry
- Repeat the process with subsequent layers, gradually building up colors and values
- Continue layering until you achieve the desired depth and intensity
- Experiment with color mixing and transparency for added effects
- Allow the final glaze to dry completely before making any additional adjustments or details
The glazing technique is a versatile method that can be used in various watercolor paintings, from landscapes to still life. It allows artists to create rich, translucent effects and capture the luminosity of light and color. By mastering the glazing technique, artists can elevate their watercolor paintings and explore new creative possibilities.
Tips for Watercolor Beginners
As a beginner in watercolor painting, there are several tips and tricks that can help you improve your skills and achieve professional-quality results. By following these tips, you can enhance your control over the medium, develop your painting techniques, and gain confidence in your artistic journey.
1. Paint in a Certain Order
When starting a watercolor painting, it’s important to paint from light to dark. This means applying lighter washes and colors first, allowing them to dry before adding darker layers. Painting in a certain order helps maintain the transparency and luminosity of watercolors.
2. Avoid Excessive Water
Water is an essential component in watercolor painting, but it’s important to find the right balance. Too much water can cause colors to bleed excessively or result in paper buckling. Experiment with different water-to-paint ratios to achieve the desired consistency and control.
3. Choose the Right Watercolor Paper
The type of watercolor paper you use can significantly impact your painting. Choose a high-quality, heavyweight paper that can withstand multiple washes and lifts without becoming too saturated or warped. Cold-pressed or rough textures are ideal for achieving interesting watercolor effects.
4. Utilize the Side of the Brush
In addition to using the tip of the brush, try using the side of the brush to create broad strokes and fill larger areas more efficiently. Experiment with different brush angles and pressure to achieve a variety of textures and effects in your watercolor paintings.
5. Mix More Paint Than Needed
When mixing colors for your watercolor paintings, it’s better to mix more paint than you think you’ll need. This ensures color consistency throughout your painting and prevents running out of a particular color mid-stroke. You can always save any unused mixed paint for future use.

| Tips for Watercolor Beginners |
|---|
| Paint in a Certain Order |
| Avoid Excessive Water |
| Choose the Right Watercolor Paper |
| Utilize the Side of the Brush |
| Mix More Paint Than Needed |
Conclusion
Watercolor techniques are a gateway to unleashing your artistic potential and bringing your creative vision to life. With a myriad of techniques at your disposal, such as wet-on-wet, wet-on-dry, and glazing, you have the tools to explore a wide range of expressive possibilities in your watercolor paintings.
By immersing yourself in the world of watercolor techniques, you can enhance your skills as a watercolor artist and create stunning artworks that captivate viewers. Through practice and dedication, you can refine your understanding of these techniques and develop your own unique style that sets you apart.
Remember that watercolor painting is a journey of continuous learning and growth. Patience is key as you navigate the complexities of the medium and experiment with different approaches. Embrace the magic of watercolors, embrace the fluidity of the paint, and let your creativity flow.
So, grab your watercolor brushes, immerse yourself in the world of painting techniques, and embark on an artistic adventure that will unlock new artistic possibilities. With every stroke of the brush, you’ll discover the beauty and versatility of watercolor, creating art that speaks to your soul and captivates the world.